
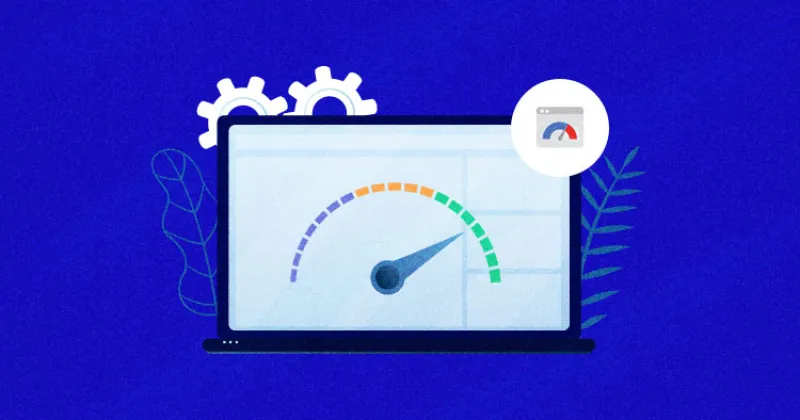
Google PageSpeed Insights (PSI) has become a de‑facto benchmark for web performance. A high PSI score not only pleases the algorithmic eye of search engines but also translates into faster page loads, lower bounce rates, and better conversion metrics for real users. For WordPress site owners, the challenge is to bridge the gap between the platform’s flexibility and the stringent performance expectations set by Google. This guide walks you through a systematic, step‑by‑step approach to raising your PSI score while preserving the functionality and aesthetic appeal of a typical WordPress site.
1. Understand What PSI Measures
Before you begin tweaking, it helps to know the three pillars PSI evaluates:
| Pillar | What It Looks At | Why It Matters |
|---|---|---|
| Largest Contentful Paint (LCP) | Time taken for the biggest visible element (usually an image or headline) to render. | Directly impacts perceived loading speed. |
| First Input Delay (FID) | Latency between a user’s first interaction (click, tap, key press) and the browser’s response. | Affects interactivity; crucial for engagement. |
| Cumulative Layout Shift (CLS) | The amount of unexpected movement of page elements during load. | Poor CLS creates a jarring experience. |
A well‑optimized WordPress site will deliver low numbers in each of these categories, thereby earning a strong overall PSI rating.
2. Begin with a Baseline Audit
- Run PSI on Multiple Devices – Test both mobile and desktop. Mobile scores typically reveal more issues because of constrained bandwidth and CPU resources.
- Record Key Metrics – Note LCP, FID, CLS, total blocking time, and the list of “Opportunities” PSI suggests.
- Identify the Biggest Offenders – Is the LCP dominated by a large hero image? Are third‑party scripts blocking the main thread? Pinpoint the root causes before you start fixing anything.
A single audit provides a reference point to measure the impact of each optimization you apply.
3. Choose a Performance‑Focused Hosting Environment
WordPress runs on any LAMP/LEMP stack, but not all hosting providers deliver the same speed.
- Managed WordPress Hosting – Companies such as Kinsta, SiteGround, or WP Engine provision servers tuned for PHP‑7+, HTTP/2, and built‑in caching layers.
- Server Location – Select a data center geographically close to your target audience. A CDN (covered later) can mitigate distance, but a good origin server still matters.
- PHP Version – Upgrade to the latest stable PHP release (as of 2026, PHP 8.2). Newer versions dramatically improve execution speed and memory usage.
- HTTPS with HTTP/2/3 – Enable TLS and ensure the server supports HTTP/2 or HTTP/3, which multiplexes resources and reduces latency.
If you’re on a shared plan that restricts these features, consider migrating to a VPS or managed WordPress platform before proceeding with deeper optimizations.
4. Leverage Caching at Every Level
Caching is the single most effective technique for shrinking load times.
4.1 Page Cache
A page cache stores the fully rendered HTML of a post or page and serves it directly to visitors, bypassing PHP and database queries.
- Plugins – Use reputable caching plugins such as WP Rocket, W3 Total Cache, or LiteSpeed Cache (if you’re on a LiteSpeed server). Configure them to cache both desktop and mobile views.
- Cache Lifespan – Set a reasonable expiration time (e.g., 10–30 minutes) for dynamic sites, longer for static content.
4.2 Object Cache
For sites that make frequent database calls (e.g., WooCommerce), an object cache reduces query load.
- Enable Redis or Memcached at the server level and activate the corresponding WordPress plugin (Redis Object Cache is a popular choice).
4.3 Browser Cache
Instruct browsers to keep static assets (CSS, JavaScript, images) for a defined period.
- Add the following directives to your
.htaccess(Apache) ornginx.conf(Nginx) file:
<IfModule mod_expires.c>
  ExpiresActive On
  ExpiresByType image/webp "access plus 1 year"
  ExpiresByType image/jpeg "access plus 1 year"
  ExpiresByType image/png  "access plus 1 year"
  ExpiresByType text/css   "access plus 1 month"
  ExpiresByType application/javascript "access plus 1 month"
</IfModule>
A well‑configured cache hierarchy ensures that most repeat visits never hit the server again.
5. Optimize Images – The Largest Contentful Paint Hero
Images are often the biggest contributors to LCP. Optimizing them yields immediate PSI gains.
5.1 Choose the Right Format
- WebP – Provides superior compression without visible quality loss. All modern browsers support it.
- AVIF – Even better compression for photographic content, though support is still emerging (Safari 16+).
- JPEG‑XL – A future‑proof alternative, but not yet widely adopted.
Where possible, serve a WebP/AVIF version alongside the original and let the browser pick the best format via the <picture> element or a server‑side rewrite rule.
5.2 Resize to Exact Dimensions
Never upload a 3000 px wide image for a 800 px container. Use a bulk‑resize plugin (e.g., ShortPixel, Imagify, or EWWW Image Optimizer) that can automatically generate appropriately sized thumbnails for each theme breakpoint.
5.3 Compression
- Lossless vs. Lossy – For logos and icons, lossless is safe. For photographs, a lossy setting between 70‑85 % retains visual fidelity while slashing file size.
- Automation – Enable “auto‑optimize on upload” in your chosen plugin to remove the manual step.
5.4 Lazy Loading
WordPress core now adds loading="lazy" to all images, but you can improve the experience:
- Defer off‑screen images with a small JavaScript polyfill that adds the attribute only after the page’s critical content has rendered.
- Exclude above‑the‑fold images from lazy loading; they should load immediately to improve LCP.
6. Minify, Combine, and Defer CSS & JavaScript
Excessive or unoptimized CSS/JS files are a leading cause of high Total Blocking Time (TBT), which in turn hurts FID.
6.1 Minification
- Remove whitespace, comments, and unnecessary code. Plugins like Autoptimize or WP Rocket handle this automatically.
- Ensure source maps are disabled for production to avoid unnecessary payload.
6.2 Combine Files (When Appropriate)
Merging multiple CSS files reduces HTTP requests, but with HTTP/2 the benefit diminishes. Only combine files if you notice a large number of tiny requests (e.g., dozens of 1‑2 KB CSS snippets from a page builder).
6.3 Defer Non‑Critical CSS
- Critical CSS Generation – Tools such as Critical or the “Inline Critical CSS” option in WP Rocket extract the CSS required to render above‑the‑fold content and embed it directly in the
<head>. The remaining stylesheet loads asynchronously. - Font Loading – Use
font-display: swapto prevent custom fonts from blocking text rendering.
6.4 JavaScript Deferral
- Add the
deferattribute to script tags that are not needed for initial rendering. WordPress’swp_enqueue_scriptcan be hooked to add this attribute automatically. - For scripts that must load early (e.g., jQuery required by a plugin), consider moving them to the footer and using
asyncwhere possible.
7. Trim Unused Code
Every theme and plugin brings its own CSS and JavaScript. Over time, the site can accumulate code that never runs.
- Identify Unused CSS – Use Chrome DevTools Coverage panel to see which selectors are never applied. Manually remove them from your child theme’s stylesheet or use a plugin like Asset CleanUp to dequeue entire style sheets on pages where they aren’t needed.
- Disable Unused Plugins – Deactivate and delete plugins that provide functionality you no longer use. Even inactive plugins can load assets if they hook into WordPress incorrectly.
- Select a Lightweight Theme – Themes built on large frameworks (e.g., Elementor, Divi) often include massive style sheets. If performance is a priority, consider a minimalist theme such as GeneratePress, Astra, or a custom‑coded starter theme.
8. Adopt a Content Delivery Network (CDN)
A CDN caches static assets on edge servers around the world, dramatically cutting latency for visitors far from your origin server.
- Edge Caching – Ensure the CDN caches images, CSS, JS, fonts, and even pre‑compressed HTML fragments.
- Automatic WebP Conversion – Many CDN services (Cloudflare, KeyCDN, BunnyCDN) can automatically serve WebP equivalents for browsers that support the format.
- HTTP/2 Push (Optional) – Some CDNs allow you to push critical assets to the client, reducing the number of round trips required to fetch them.
When configuring a CDN, set a long Cache‑Control max‑age for immutable assets and configure a “cache‑busting” query string or version number for assets that change (e.g., style.css?ver=1.3.4).
9. Optimize Database Performance
A sluggish database can increase server‑side response time, indirectly inflating LCP and TBT.
- Clean Up Post Revisions and Orphaned Data – Plugins such as WP‑Optimize or Advanced Database Cleaner safely prune unnecessary rows.
- Index Frequently Queried Tables – For large WooCommerce catalogs, ensure product meta tables have appropriate indexes. This sometimes requires a developer’s touch.
- Scheduled Maintenance – Set a weekly cron job to run
OPTIMIZE TABLEon high‑traffic tables.
A lean database returns queries faster, allowing cached pages to be generated without delay.
10. Reduce Third‑Party Scripts
Analytics, ads, social widgets, and marketing tags each add a network request and often block the main thread.
- Load Asynchronously – Insert scripts with
asyncordeferwherever possible. - Tag Managers – Use Google Tag Manager to consolidate multiple analytics tags, but limit the number of active tags on any given page.
- Self‑Host Where Feasible – Some scripts (e.g., Font Awesome) can be hosted locally, eliminating the need for external DNS lookups.
Every additional script is a potential PSI “Opportunity” that can be eliminated.
11. Implement Structured Data Sparingly
Rich snippets improve SEO but can also impact performance if they are generated on the fly for every page.
- Static JSON‑LD – Where possible, hard‑code schema markup into the template rather than building it via PHP for each request.
- Schema Plugins – Choose plugins that cache generated markup and provide an option to output it as a static file.
12. Continuous Monitoring and Regression Testing
Performance optimization is not a one‑off task. After each major change:
- Re‑run PSI – Compare the new scores against the baseline. Record the precise metric differences.
- Use Real‑User Monitoring (RUM) – Services like Google Analytics Site Speed, New Relic, or SpeedCurve provide field data that complements synthetic PSI tests.
- Automate Audits – Incorporate Lighthouse CI into your deployment pipeline. This way, any commit that degrades performance is caught before it reaches production.
13. Checklist for a High PSI Score
Below is a quick-reference checklist you can use after completing the steps above:
- Hosting supports PHP 8.2, HTTP/2/3, TLS 1.3.
- Page cache enabled with a 10‑minute TTL.
- Object cache (Redis/Memcached) active.
- Browser caching headers set for at least 1 month on static assets.
- All images served in WebP/AVIF, resized, and compressed.
- Critical CSS inlined; remaining CSS loaded asynchronously.
- JavaScript deferred or async; no render‑blocking scripts in the head.
- Unused CSS/JS dequeued per page.
- CDN delivering static assets from edge locations.
- Database cleaned and indexed.
- Third‑party scripts limited and loaded non‑blocking.
- Regular PSI and RUM reports reviewed.
Crossing each box moves you closer to the “Good” or “Excellent” PSI bands for both mobile and desktop.
14. Frequently Asked Questions
Q: Will minifying CSS/JS break my site?
A: If you use reputable plugins that offer a “test mode,” you can preview the minified output before making it live. Always keep a backup of the original files.
Q: Is it safe to combine all CSS into one file?
A: With HTTP/2 the performance gain from combining files is marginal. Focus instead on eliminating unused CSS and loading non‑critical styles asynchronously.
Q: How often should I re‑optimize images?
A: Whenever you add new media. Consider enabling “auto‑optimize on upload” to make this a hands‑off process.
Q: Do I need a separate caching plugin if my host already provides caching?
A: Most managed hosts layer a server‑side cache that works well, but a WordPress‑level caching plugin adds browser‑cache control, minification, and lazy loading features that the host may not provide.
15. Final Thoughts
Improving Google PageSpeed Insights for WordPress is a blend of strategic decisions and tactical tweaks. Start with a solid hosting foundation, then systematically address caching, image handling, code delivery, and third‑party bloat. Each improvement you make will be reflected not only in a higher PSI score but also in real‑world benefits: quicker page loads, happier visitors, and better rankings.
Remember that performance is a moving target. Browser standards evolve, new image formats appear, and Google’s ranking algorithms tighten. By treating PSI as a continuous performance health metric rather than a one‑time checklist, you ensure your WordPress site stays fast, functional, and future‑proof.

Jimmy Anand is a content creator that gets inspired by many aspects of life, internet or whatever inspires him at that moment. When he's not online he's gaming and when he is not gaming he is online trolling discussion boards.
Related Posts
5 Reasons Why Everyone is Moving Their Website to WordPress
In today's hyper-connected world, a robust online presence isn't just an advantage – it's an absol... Read More
Best ways to Update WordPress Safely
Updating WordPress is an essential task for any website owner, as it ensures that your website remai... Read More
How to Master WordPress Block Themes Without Coding
Learn step‑by‑step how to build beautiful, SEO‑friendly WordPress sites using block themes, vi... Read More
Top Posts

What Companies Need Predictive Maintenance Software?
In a world increasingly driven by data and the relentless pursuit of efficiency, the traditional approaches to asset maintenance—reactive (fix-it-when-it-brea...Read More

The Dark Side of Social Media: How Online Safety Can Impact Your Mental Health
Social media can have a significant impact on our mental health, both positively and negatively. Learn how to prioritize online safety and promote a healthier o...Read More

Riding the SERP Wave: How Real‑Time Features Are Reshaping Visibility
The SERP has evolved from a static list to a dynamic, AI‑driven interface. This post reveals how B2B SaaS marketers can leverage new SERP features, personaliz...Read More
The Human‑Centric Playbook for On‑Page SEO Success
Discover a new approach to on‑page SEO that blends cognitive biases, voice search tactics, accessibility, and performance to create pages that both Google and...Read More
0 Comments
Post Comment
You will need to Login or Register to comment on this post!